DC Motor Control With Raspberry Pi 5 and L293N
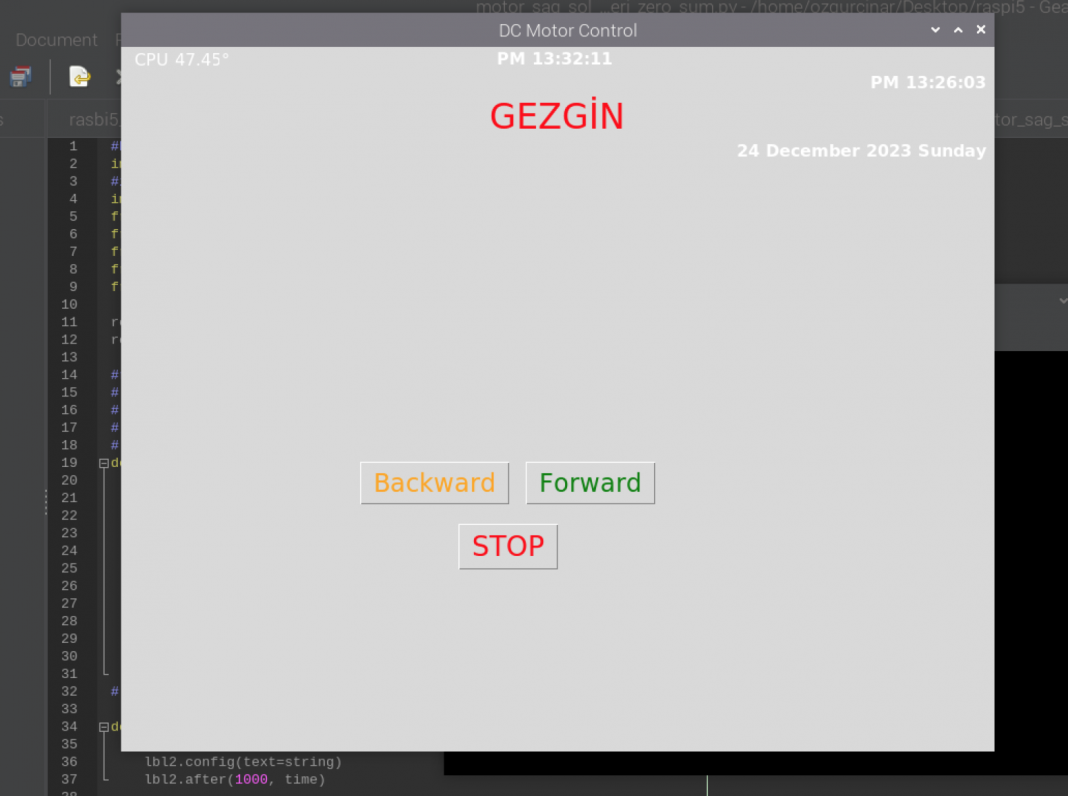
User interface has time & Date & CPU Temp & 3 Button labels.
#https://pinout.xyz/pinout/jtag
import gpiod as GPIO
#import RPi.GPIO as GPIO
import tkinter as tk
from tkinter import *
from time import sleep
from time import strftime
from gpiozero import CPUTemperature
from gpiozero import Motor

root = tk.Tk()
root.title("DC Motor Control")

#root2 = Tk()   #saat penceresi
# This function is used to
# display time on the label
# ozgurcinar@gmail.com
# mdemirkiran@hotmail.com
def cputemp():

    lbl=Label(root, text="  CPU :", fg='white', font=("calibri", 12))
    lbl.place(x=1, y=1)

    cpu = CPUTemperature()
    #relief=RAISED, label , 3boyutlu efekti
    lbl=Label(root, text=cpu.temperature, fg='white', font=("calibri", 12))
    lbl.place(x=50, y=1)
    lbl.after(5000, cputemp) # update cycle

    lbl=Label(root, text=chr(176), fg='white', font=("calibri", 12))
    lbl.place(x=95, y=1)
#    lbl.pack(anchor='sw', side='bottom') # satir satir

def time():
	string = strftime('%p %H:%M:%S ')
	lbl2.config(text=string)
	lbl2.after(1000, time)

# Styling the label widget so that clock
# will look more attractive
lbl2 = Label(root, font=('calibri', 12, 'bold'),
#background='purple',
foreground='white')

# Placing clock at the centre
# of the tkinter window
#lbl2.pack(anchor='se', side='bottom')
lbl2.place(x=340, y=55)
root.geometry('1200x800')
lbl2.pack(anchor='center')


#mainloop()  #  ilk pencere buraya kadar .
             # kapat diger pencerelere
#root3 = Tk() # bos pencere

def pdate():
    string = strftime(' %d %B %Y %A ')

    lbl4 = Label(root, font=('calibri', 12, 'bold'),foreground='white')
    lbl4.config(text=string)
    lbl4.place(x=340, y=5)
#    root.geometry('1200x800')
    lbl4.pack(anchor='ne', side='top')


def timess():
	string = strftime('%p %H:%M:%S ')
	lbl3.config(text=string)
	lbl3.after(1000, time)

# Styling the label widget so that clock
# will look more attractive
lbl3 = Label(root, font=('calibri', 12, 'bold'),
#background='purple',
foreground='white')

# Placing clock at the centre
# of the tkinter window
#lbl2.pack(anchor='se', side='bottom')
#lbl3.place(x=340, y=5)
root.geometry('1000x300')
lbl3.pack(anchor='ne', side='top')

motor_R = Motor(forward=17, backward=18)

# GPIO pin tanimlamalari
motor_L = Motor(forward=23, backward=24)

# Motor durumlar
def forward():
    motor_R.forward()
    #sleep(4)
    #stop()

def backward():
    motor_R.backward()
    #sleep(4)
    #stop()

def stop():
    motor_R.stop()

# Tkinter GUI
def create_gui():

    lbl=Label(root, text="GEZGIN", fg='red', font=("calibri", 25))
    lbl.place(x=340, y=25)
    root.geometry('1200x800')
    lbl.pack(anchor='center')

    time()
    pdate()
    cputemp()

    timess()

    # Ileri hareket dugmesi
    forward_button = tk.Button(root, text="Forward", command=forward,fg='green',font=("calibri", 18))
    forward_button.place(x=390, y=400)
    #forward_button.pack()

    # Geri hareket dugmesi
    backward_button = tk.Button(root, text="Backward", command=backward, fg='orange', font=("calibri", 18))
    backward_button.place(x=230, y=400)
    #backward_button.pack()

    # Durdurma dugmesi
    stop_button = tk.Button(root, text="STOP", command=stop, fg='red',font=("calibri", 20))
    stop_button.place(x=325, y=460)
    #stop_button.pack()
    # GUI dongusu baslat

    root.mainloop()
if __name__ == "__main__":
    create_gui()
